Using your computer is all about productivity. And being productive means you need to be organized. On macOS, a good place to start being organized is your Dock. One thing you can do is to add space separators in your dock so you can easily find what you’re looking for.
Another trick is to add a Recent Items folder to the Dock. This folder displays the recently closed apps/documents/servers/etc. It will not only clean up your Dock but it will also save you a lot of time when working with the same items over and over again.
Jump over the break to learn how to quickly access your recently closed items right from your Dock…
1. Open System Preferences and go to General. Make sure “Recent Items” is enabled, and choose how many recent items you want to be displayed via the drop down menu.

2. Open terminal and type: defaults write com.apple.dock persistent-others -array-add ‘{ “tile-data” = {“list-type” = 1; }; “tile-type” = “recents-tile”;}’ && \killall Dock
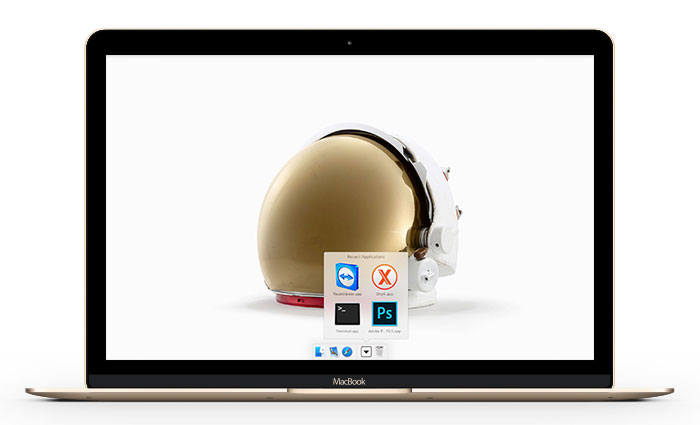
3. Hit enter. You will notice that your Dock will refresh and you’ll have a new item next to the trash. This will get populated as soon as you open apps and will look something like this.
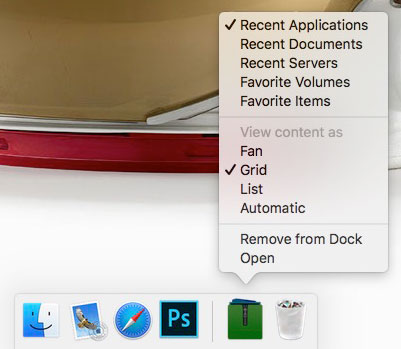
 4. Right click on the new recent items icon and you can choose what to display. You can choose between Recent Apps, Recent Documents, Recent Servers, Favorite Volumes and Favorite Items.

5. If you want to have two ( or more ) recent items folders in your dock ( i.e recent apps and recent documents ), just run the terminal command twice and set each item to display what you need.
6. If you want to remove the recent items folder from your dock, you can do so just like you’d remove any other item from your dock. You can either right click on it and choose “Remove from Dock” or drag it out of the dock.


