 Like it or not we need to start using encryption in everyday tasks. Privacy is a fundamental right and “I have nothing to hide” is a bullsh*t argument for not using encryption and has nothing to do with privacy. Most of us, 99% of the time, have nothing to hide, but that doesn’t mean we should give everything away, for free, on a silver f***ing platter.
Email encryption is easy, and you won’t have to spend a dime as we’re going to use only free and open source tools.
First things first. This tutorial is aimed at beginners and meant as something that will get you up and running. Start here, learn the basics and then do some research on your own to learn more.
You’ll probably learn some new terms here. Like GnuPG. What the hell is that?
GnuPG, GPG, GNU Privacy Guard, PGP or OpenPGP are pretty much the same term. PGP which stands for “Pretty Good Privacy” or OpenPGP is the encryption standard and GNU Privacy Guard ( aka GPG or GnuPG ) is the program that implements the standard.
Enigmail ( you’ll see below ) is just an add-on that provides an interface for GnuPG.
To use GPG you’ll need a keypair which consists of a public key and a private key. These keys are a long string of randomly generated number and letters and are linked together. These keys are also unique to you.
The public key is something that can be sent ( or posted online or uploaded to online directories called keyservers ) to other people so they can encrypt the mails they send to you.
The private key is something you need to keep to yourself, and is used (alongside GnuPG ) to decrypt the encrypted emails you receive.
You should never share you private key with anyone, under any circumstances. EVER.
These keys can also be used to sign messages and check the authenticity of other people’s signatures.
You will need:
- Thunderbird (+ Enigmail add-on )
- GPG Suite
- GPG Suite Uninstaller – OPTIONAL. GPG Suite will install a bunch of services including GPG Mail. GPG Mail integrates GPG into the stock macOS mail client app. However this is a paid service ( one-month trial included ) and the aim here is to move away as much as possible from proprietary software. Yes, including Apple’s own closed bullsh*t. F*** Apple.
NOTE: This tutorial is aimed at macOS users. However the process is similar for Linux and Windows users.
Most Linux distros come with GnuPG installed on them, so you don’t have to download it. Skip it that part.
Windows users need to download and install GPG4Win.
Let’s get started:
1. Download Thunderbird

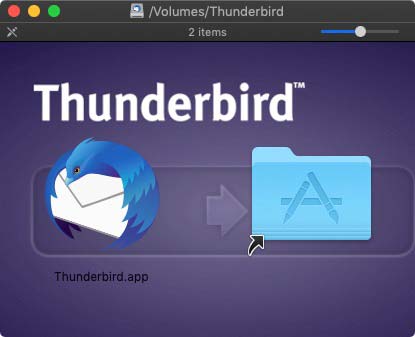
2. Install Thunderbird
 3. Go through the Thunderbird wizard and set-up your email account. I suppose you already know how to do that. If you don’t know how to set up an email account, then you might want to really reflect on why you paid over $1,000 for a phone, $2,000 for a tablet and $3,000+ for a computer. Oh yeah, i forgot… it just works. No idea how, but it does.
 4. Install GPG suite. Follow the installation wizard and choose the default options whenever asked. After installation is complete GPG Keychain will open. You can leave it open or close it.
 4.1 OPTIONAL STEP – as mentioned above, the GPG Suite will install a bunch of services including GPG Mail. GPG Mail integrates GPG into the stock macOS mail client app. Let’s remove it.
Unzip the “GPG_Suite_Uninstaller.zip” file and run the GPG Suite Uninstaller. When asked, click on “Uninstall GPG Mail Only”

5. Back to Thunderbird, click on the hamburger button on the top right of Thunderbird and choose “Add-ons”
 6. You should see Enigmail on the front page as a “Featured Add-ons”. If you don’t, click on “Extensions” on the left menu bar and then search for it via the search box on the top right corner.
 7. Install Enigmail. After installation, even though it shouldn’t be required, it might be a good idea to restart Thunderbird.
 NOTE: After installation, your emails might look weird. That’s because Enigmail doesn’t tend to play nice with HTML, which is used to format emails, so it may disable your HTML formatting automatically. To send an HTML-formatted email without encryption or a signature, hold down the Shift key when you select compose. You can then write an email as if Enigmail wasn’t there.
7. The Enigmail Setup Wizard should start automatically. If it doesn’t, from the Thunderbird menu, choose Enigmail > Setup Wizard.
 8. Click Next
 9. If you only have one email account in your Thunderbird it will be selected by default. If you have multiple email accounts, select the email account you want to create the key pair for and set a strong password. DO NOT forget the password. Also set Enigmail to remember the passphrase for 0 minutes before needing to re-enter it. ( repeat step for all email accounts )
 10. Wait a few seconds for the key to be created. Move your mouse around while you wait. When it’s done Enigmail will let you know. Click “Close” and “Continue”
 11. This is an important step. You definitely want to create a “Revocation Certificate”. Click on “Create Revocation Certificate”
 12. Enter the passphrase you’ve set earlier and uncheck “save in Keychain”. Click OK.
NOTE: you will want to keep this certificate safe. I’d recommend to encrypt it in a VeraCrypt container or Cryptomator and keep it on your computer and on an USB drive that you can keep safe somewhere.
 13. Click “Close” and “Continue”
 14. You’re done.
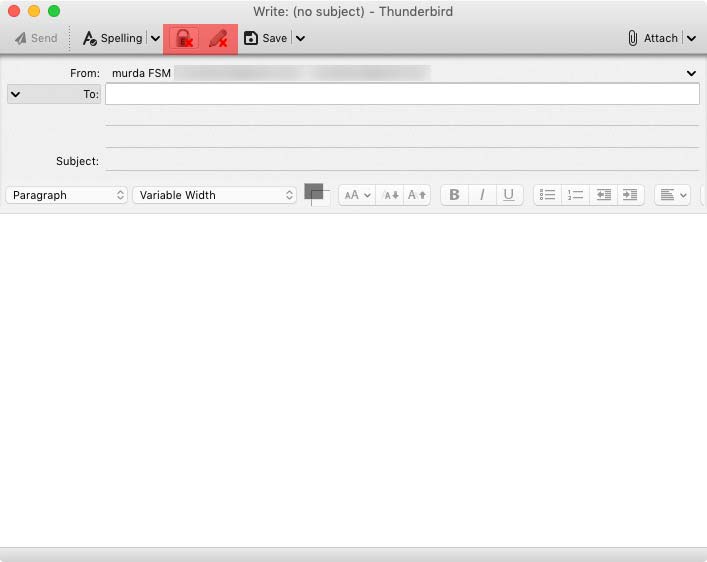
 15. Now every time you compose a new email you’ll notice two new buttons: to encrypt and to sign your email.

A few notes:
1. NEVER EVER distribute your private key. You only give away your public key.
2. Encrypt as much as possible ( all of your emails ) not just here and there. Look, it doesn’t matter if you’re email says “hey, how are you?” or “here’s my top secret info”. That’s not the point.
3. Even if you encrypt your email, the subject line is not encrypted, so don’t put private information there. The sending and receiving addresses aren’t encrypted either. When you send attachments, Enigmail will give you the choice to encrypt them or not, independent of the actual email.
For greater security against potential attacks, you can turn off HTML. Instead, you can render the message body as plain text.
This is, of course, just the starting point of email encryption. It’s a great start and it shows you that encrypting your email is not that hard. It takes like what? 10 minutes to set it up.
Start here, and do further research on your own now that you have the basics. Get everybody to set it up and encrypt those emails.


