Over the time you’ve created quite a few profiles on different services and, chances are, you used the same username for all of them. ( hopefully not the same password – never use the same password everywhere. Use a password manager like KeePass or Bitwarden ).
It’s definitely a good idea to audit your username(s) and delete those profiles if you’re not using them anymore. And to make your job easier, you can hunt down your username(s) across a vast list of services using Sherlock.
ALSO READ Instaloader: Download Photos and Videos with Captions and Metadata from Instagram
NOTE: this tutorial shows you how to use sherlock on macOS. However, since sherlock is a python script and python is cross-platform, you should be able to use it on any OS or computer you might have.
1. First things first. Make sure you have the latest version of python installed on your Mac. At the time of this writing the latest version is 3.7.4. To check your version open up a terminal and type python3 –version

1.1 If you have an older version the easiest way to update is via Homebrew ( click on homebrew to learn how to install and use it ). Once Homebrew is installed, updating python is at easy as typing brew install python3
2. Now that python is installed and up to date, let’s install sherlock.
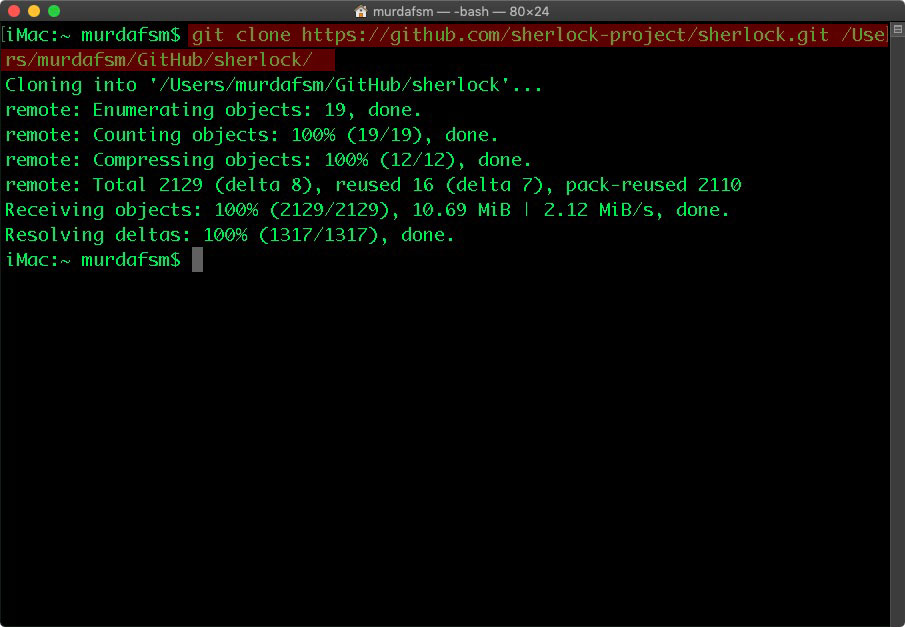
2.1 In the terminal you will type git clone https://github.com/sherlock-project/sherlock.git ‘path_to_clone’ – where ‘path_to_clone’ is where you want sherlock to be saved on your computer. In my case is /GitHub/sherlock/ ( clone it wherever you want. it’s your choice )

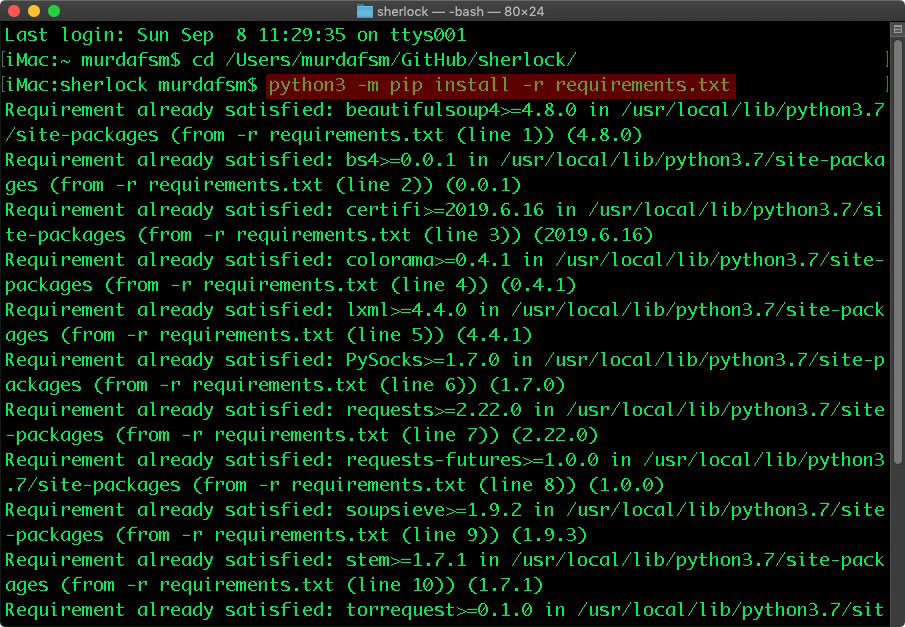
2.2. Now change the working directory to sherlock by typing cd /path/to/sherlock_clone – where /path/to/sherlock_clone is wherever you’ve cloned sherlock on your computer.

2.3 Install sherlock requirements by typing python3 -m pip install -r requirements.txt ( in my case requirements are already satisfied )
 NOTE: if something fails, make sure you have python3 and python3-pip installed.
3. Now that you have sherlock installed and ready to go it’s time to search. Sherlock supports 177 services and you can check the full list here.
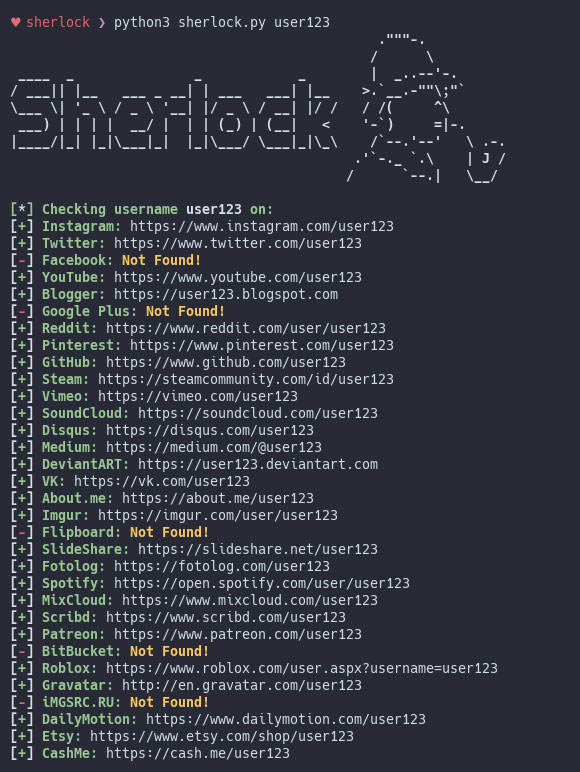
While in sherlock directory, you can type python3 sherlock.py your-username. To demonstrate how it works, I’ll use Elon Musk as an example. I know that his Twitter username is @elonmusk, so the command will be python3 sherlock.py elonmusk

3.1 Sherlock will go through each of the 177 services and look if there’s an account with the same username and it will display the outcome. How to read the outcome? Well you can scroll through what it’s being shown in the terminal window or if you use the ls command you will notice that there’s a new elonmusk.txt file inside the sherlock folder. The text file contains a list of all the services that have a profile for the searched username.

3.2 You have to options: you can either browse in your file manager of choice ( on macOS it should be Finder ) to the sherlock folder and open up the username.txt file OR in the terminal use nano username.txt.

This is the basic of using sherlock. But, you can also use it through Tor, load data from a JSON file, search for multiple usernames at the same time, build the image and run it as a Docker container etc.
To learn more about how to use sherlock, check out the official project page on GitHub.


